Support our educational content for free when you purchase through links on our site. Learn more
7 Basic Cleaning Steps to a Sparkling Clean Home ✨
Remember that time you were invited to a last-minute dinner party and your house looked like a tornado had swept through? 🌪️ We’ve all been there! But fear not, because we’re about to reveal the 7 basic cleaning steps that will transform your home from chaotic to clean in no time. Think of this as your ultimate cleaning cheat sheet, packed with expert tips, tricks, and shortcuts that will make your cleaning routine a breeze. We’ll cover everything from decluttering and dusting to vacuuming and mopping, leaving you with a sparkling clean home that you can be proud of.
So, grab your cleaning supplies, put on your favorite playlist, and let’s get started! 🎶
Key Takeaways
- Decluttering is key: A clutter-free space is much easier to clean. Start by sorting through your belongings and getting rid of anything you don’t need.
- Work from top to bottom: This prevents dust and debris from settling on already-cleaned surfaces. Gravity is your friend!
- Use the right tools: Invest in quality cleaning supplies and tools that are designed for specific tasks.
- Don’t forget the final touches: Making your bed, fluffing pillows, and adding a pleasant scent can make a big difference in the overall appearance of your home.
👉 Shop for Cleaning Supplies on:
- Mrs. Meyer’s Clean Day: Amazon | Walmart | Mrs. Meyer’s Clean Day Official Website
- Windex: Amazon | Walmart | Windex Official Website
- Lysol: Amazon | Walmart | Lysol Official Website
Table of Contents
- Quick Tips and Facts
- The Evolution of Cleaning: From Buckets to Bots
- Getting Ready: Setting the Stage for a Sparkling Clean
- Taking Stuff Out: Decluttering and Organizing for a Fresh Start
- Dusting Everything: Banishing the Fine Layer of Filth
- Cleaning Surfaces: From Countertops to Cabinets
- Vacuuming and Sweeping: Taming the Dust Bunnies
- Mopping the Floor: Bringing Back the Shine
- Final Touches: The Finishing Touches for a Pristine Home
- Cleaning with a Green Conscience: Eco-Friendly Cleaning Solutions
- Cleaning Hacks and Shortcuts: Time-Saving Tips for Busy Lives
- The Power of Prevention: Keeping Your Home Clean Between Deep Cleans
- Conclusion
- Recommended Links
- FAQ
- Reference Links
Quick Tips and Facts 🧹🧽
Before diving into the nitty-gritty of the 7 basic cleaning steps, let’s arm ourselves with some quick tips and fascinating facts. Did you know that the average person spends about 6 hours a week cleaning? That’s almost an entire workday! 🤯 But don’t worry, we’re here to make those hours more efficient and less daunting.
Speed Cleaning Secrets 💨
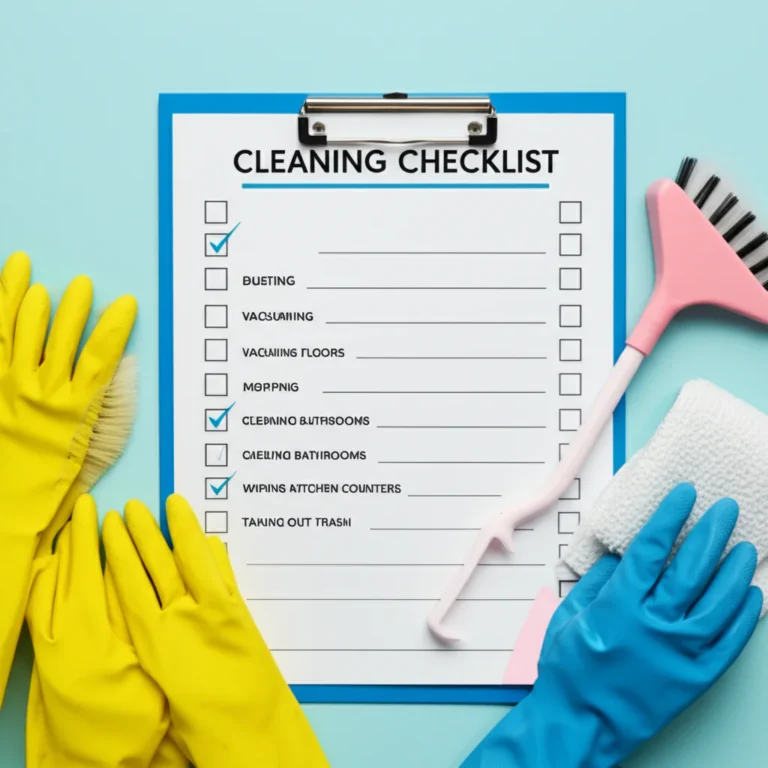
- Focus on high-traffic areas: Studies show that areas like entryways, kitchens, and bathrooms accumulate the most dirt and grime. Learn more about creating a cleaning checklist at Cleaning Checklist™.
- Work from top to bottom: This prevents dust and debris from settling on already-cleaned surfaces. Gravity is your friend!
- Declutter first, clean second: A clutter-free space is much easier (and faster) to clean.
- Multitask like a pro: While one surface is drying, move on to the next task.
Fascinating Cleaning Facts 🤯
- The first vacuum cleaner was invented in 1901 and was horse-drawn! 🐴
- The average kitchen sink contains more bacteria than a toilet seat. 🤢
- Baking soda is a natural deodorizer and can be used to clean almost anything!
- Vinegar is a natural disinfectant and can be used to clean windows and mirrors.
The Evolution of Cleaning: From Buckets to Bots 🪣🤖
Cleaning, a chore as old as civilization itself, has come a long way from the days of using sand and vinegar to scrub floors. From simple brooms to high-tech robotic vacuums, the tools and techniques we use to maintain clean and healthy homes have evolved dramatically.
Ancient Origins 🏺
In ancient Egypt, cleanliness was associated with spirituality and health. Egyptians used natural ingredients like natron (a type of salt), vinegar, and incense to clean their homes and bodies. The Romans were also known for their public baths and sophisticated sanitation systems.
The Rise of Modern Cleaning 🧼
The Industrial Revolution brought about significant advancements in cleaning technology. The invention of the vacuum cleaner in the early 20th century revolutionized home cleaning, while the development of synthetic detergents and disinfectants made it easier to kill germs and bacteria.
Cleaning in the Digital Age 📱
Today, we live in a world of smart homes and connected devices. Robotic vacuums, self-cleaning ovens, and even app-controlled air purifiers are becoming increasingly common. These technological advancements are making cleaning more efficient and convenient than ever before.
Getting Ready: Setting the Stage for a Sparkling Clean 🎶
Before you embark on your cleaning mission, it’s crucial to set the stage for success. Think of it as preparing for a performance – a cleaning performance, that is!
Gather Your Cleaning Arsenal ⚔️
- All-purpose cleaner: A good all-purpose cleaner is your go-to for most surfaces. We recommend Mrs. Meyer’s Clean Day Multi-Surface Cleaner for its effectiveness and delightful scents.
- Glass cleaner: For sparkling windows and mirrors, you can’t beat Windex Original Glass Cleaner.
- Bathroom cleaner: Bathrooms need a dedicated cleaner that can tackle soap scum and mildew. Lysol Bathroom Cleaner is a reliable choice.
- Microfiber cloths: Microfiber cloths are amazing at trapping dust and dirt. We recommend having a variety of colors for different purposes (e.g., one for glass, one for dusting, etc.).
- Sponges: Sponges are essential for washing dishes and cleaning surfaces.
- Scrub brush: A good scrub brush is a must-have for tackling tough grime.
- Trash bags: You’ll need plenty of trash bags to collect all the dirt and debris.
- Vacuum cleaner: A vacuum cleaner is essential for cleaning carpets and floors.
- Mop: A mop is necessary for cleaning hard floors.
Protect Yourself and Your Belongings 🧤
- Gloves: Wearing gloves protects your hands from harsh chemicals and germs.
- Old clothes: Wear clothes you don’t mind getting dirty.
- Eye protection: Eye protection is essential when using strong cleaners.
Create a Cleaning Playlist 🎶
Cleaning is much more enjoyable with music! Put on your favorite playlist to keep you motivated and energized.
Taking Stuff Out: Decluttering and Organizing for a Fresh Start 🗑️✨
Now that you’ve gathered your cleaning supplies, it’s time to tackle the clutter. Decluttering is the first step to a truly clean and organized home. It’s not just about getting rid of stuff – it’s about creating a more peaceful and functional space.
Sort and Purge 📦
- Start small: Don’t try to declutter your entire house in one day. Start with a small area, like a drawer or a shelf.
- Be ruthless: Ask yourself if you really need each item. If you haven’t used it in months (or years!), it’s probably time to let it go.
- Create three piles: Keep, donate, and trash.
- Don’t forget sentimental items: It’s okay to keep items that have sentimental value, but be selective.
Find a Place for Everything 🗄️
- Utilize storage solutions: Baskets, bins, and shelves can help you keep your belongings organized.
- Label everything: Labeling helps you find things quickly and easily.
- Make it a habit: Put things away as soon as you’re done with them to prevent clutter from building up again.
The Benefits of Decluttering 😌
- Reduces stress: A cluttered home can contribute to feelings of stress and anxiety.
- Improves sleep: A clean and organized bedroom can promote better sleep.
- Saves time: You’ll spend less time looking for things when everything has its place.
- Increases productivity: A clutter-free space can help you focus and be more productive.
Dusting Everything: Banishing the Fine Layer of Filth 🌬️
Dust is the enemy of a clean home. It settles on every surface, making your home look dull and dingy. But fear not, we’re here to help you banish that fine layer of filth!
Top-to-Bottom Approach ⬆️⬇️
- Start high: Begin by dusting ceiling fans, light fixtures, and the tops of furniture.
- Work your way down: Dust shelves, picture frames, and other objects, moving towards the floor.
- Don’t forget hidden areas: Dust behind furniture, under beds, and in hard-to-reach corners.
Tools of the Trade 🧹
- Microfiber cloths: Microfiber cloths are excellent at attracting and holding dust.
- Duster: A feather duster or a microfiber duster can be used for delicate surfaces.
- Vacuum cleaner with attachments: A vacuum cleaner with a dusting brush attachment can be used to dust furniture and blinds.
Dusting Tips 💡
- Use a damp cloth: Slightly dampen your microfiber cloth to prevent dust from scattering.
- Dust regularly: Dusting once a week is usually sufficient, but high-traffic areas may need more frequent attention.
- Consider an air purifier: An air purifier can help to remove dust from the air, reducing the amount that settles on surfaces.
Cleaning Surfaces: From Countertops to Cabinets 🚰✨
Now that the dusting is done, it’s time to tackle the surfaces. From countertops to cabinets, we’ll show you how to get them sparkling clean.
Kitchen Cleaning 🍳
- Countertops: Wipe down countertops with an all-purpose cleaner and a microfiber cloth.
- Sink: Clean the sink with a disinfectant cleaner and a scrub brush.
- Stovetop: Remove burner grates and clean them separately. Wipe down the stovetop with a degreaser.
- Oven: If your oven has a self-cleaning function, use it. Otherwise, clean it with a commercial oven cleaner.
- Refrigerator: Remove all food and shelves. Wipe down the interior with a solution of baking soda and water.
- Microwave: Place a bowl of water and lemon slices in the microwave and heat for a few minutes. The steam will loosen any food splatters, making them easier to wipe away.
Bathroom Cleaning 🚽
- Toilet: Clean the toilet bowl with a toilet bowl cleaner and a toilet brush. Wipe down the exterior with a disinfectant cleaner.
- Shower/tub: Spray the shower/tub with a bathroom cleaner and let it sit for a few minutes. Then, scrub with a scrub brush and rinse thoroughly.
- Sink: Clean the sink with a disinfectant cleaner and a scrub brush.
- Mirrors: Clean mirrors with a glass cleaner and a microfiber cloth.
General Surface Cleaning 🧽
- Cabinets: Wipe down cabinets with a damp cloth and all-purpose cleaner.
- Doors and trim: Clean doors and trim with a damp cloth and all-purpose cleaner.
- Light switches and outlets: Wipe down light switches and outlets with a disinfectant wipe.
Vacuuming and Sweeping: Taming the Dust Bunnies 🌪️🐰
Vacuuming and sweeping are essential for removing dirt, dust, and debris from floors.
Vacuuming Tips
- Choose the right vacuum: Different types of vacuums are better suited for different types of flooring. For example, a canister vacuum is a good choice for carpets, while a stick vacuum is more convenient for hard floors.
- Vacuum high-traffic areas more often: High-traffic areas, such as entryways and hallways, may need to be vacuumed several times a week.
- Don’t forget the furniture: Use the upholstery attachment to vacuum furniture, curtains, and drapes.
Sweeping Tips 🧹
- Use a broom with soft bristles: Soft bristles are less likely to scratch hard floors.
- Sweep in overlapping strokes: This will help to pick up all the dirt and debris.
- Empty the dustpan frequently: This will prevent dirt from being tracked back onto the floor.
Mopping the Floor: Bringing Back the Shine ✨
Mopping is the final step in floor cleaning. It removes any remaining dirt and grime and leaves your floors sparkling clean.
Choosing a Mop
- Traditional mop and bucket: This is the most affordable option, but it can be a bit messy.
- Spray mop: Spray mops are more convenient than traditional mops, but they may not be as effective at removing tough dirt.
- Steam mop: Steam mops use steam to clean and disinfect floors. They are a good option for people with allergies or sensitivities to chemicals.
Mopping Tips
- Prepare the floor: Sweep or vacuum the floor before mopping to remove any loose dirt and debris.
- Use the right cleaner: Choose a floor cleaner that is appropriate for your type of flooring.
- Don’t overwet the floor: Too much water can damage floors. Wring out the mop well before each use.
- Rinse the floor: After mopping, rinse the floor with clean water to remove any remaining cleaner.
- Let the floor air dry: This will prevent streaks and water spots.
Final Touches: The Finishing Touches for a Pristine Home 🖼️✨
You’re almost there! The final touches are what really make your home feel clean and inviting.
Make Your Beds 🛏️
A made bed instantly makes a room look more put-together.
Fluff Pillows and Cushions 🛋️
Fluffing pillows and cushions adds a touch of comfort and style.
Empty Trash Cans 🗑️
Empty all trash cans and replace liners.
Put Away Any Stray Items 👚
Take a final walk through each room and put away any stray items.
Light a Candle or Diffuse Essential Oils 🕯️
A pleasant scent can make your home feel more inviting.
Enjoy Your Clean Home! 😌
You’ve worked hard, now it’s time to relax and enjoy your clean and sparkling home!
Cleaning with a Green Conscience: Eco-Friendly Cleaning Solutions 🌎🌿
Cleaning our homes shouldn’t come at the expense of our planet. Fortunately, there are plenty of eco-friendly cleaning solutions that are just as effective as their conventional counterparts.
DIY Cleaning Recipes 🧪
- All-purpose cleaner: Mix equal parts water and white vinegar in a spray bottle. Add a few drops of essential oil for a pleasant scent.
- Glass cleaner: Mix equal parts water and white vinegar in a spray bottle.
- Bathroom cleaner: Sprinkle baking soda on surfaces and spray with a solution of water and white vinegar.
- Disinfectant: Mix 1/2 cup hydrogen peroxide with 1 cup water in a spray bottle.
Eco-Friendly Cleaning Products 🧴
- Method: Method offers a wide range of plant-based cleaning products that are effective and smell great.
- Seventh Generation: Seventh Generation is another great option for eco-friendly cleaning products. They are made with plant-based ingredients and are biodegradable.
- Dr. Bronner’s: Dr. Bronner’s is a multi-purpose soap that can be used for cleaning everything from dishes to floors.
Reduce Your Environmental Impact ♻️
- Use reusable cleaning cloths: Ditch the paper towels and switch to reusable microfiber cloths.
- Buy concentrated cleaners: Concentrated cleaners come in smaller bottles, reducing packaging waste.
- Choose refillable options: Look for cleaning products that come in refillable containers.
- Dispose of cleaning products properly: Never pour cleaning products down the drain. Check with your local municipality for proper disposal guidelines.
Cleaning Hacks and Shortcuts: Time-Saving Tips for Busy Lives ⏰🧹
Let’s face it, cleaning isn’t always at the top of our to-do list. But with these time-saving hacks and shortcuts, you can clean your home more efficiently and get back to the things you enjoy.
Microwave Cleaning Made Easy 🍋
Place a bowl of water and lemon slices in the microwave and heat for a few minutes. The steam will loosen any food splatters, making them easier to wipe away.
Clean Your Shower While You Shower 🚿
Keep a spray bottle of cleaner in your shower and give it a quick spritz while you’re rinsing off.
Use Dryer Sheets for Dusting 🧺
Dryer sheets are great for attracting and holding dust. Use them to dust furniture, baseboards, and even blinds.
Clean Your Dishwasher with Vinegar 🫙
Run a cycle with a cup of vinegar in the bottom of the dishwasher to remove buildup and freshen it up.
Clean Your Coffee Maker with Vinegar ☕️
Fill the coffee maker’s water reservoir with equal parts water and vinegar. Run a brew cycle, then run another cycle with just water to rinse.
Clean Your Blender in Seconds 🌪️
Fill the blender with water and a drop of dish soap. Blend for a few seconds, then rinse.
Use Baking Soda to Deodorize Your Refrigerator 🫙
Place an open box of baking soda in the refrigerator to absorb odors.
Clean Your Cutting Board with Lemon and Salt 🍋🧂
Sprinkle salt on your cutting board and rub with half a lemon. Let it sit for a few minutes, then rinse.
The Power of Prevention: Keeping Your Home Clean Between Deep Cleans 🛡️✨
Maintaining a clean home doesn’t have to be a constant battle. By incorporating a few simple habits into your daily routine, you can prevent dirt and grime from building up in the first place.
Make Your Bed Every Morning 🛏️
It’s a small task, but it makes a big difference in the overall appearance of your bedroom.
Wipe Down Surfaces Daily 🧽
Take a few minutes each day to wipe down kitchen counters, bathroom sinks, and other high-touch surfaces.
Sweep or Vacuum High-Traffic Areas Regularly 🧹
This will prevent dirt and debris from being tracked throughout your home.
Put Things Away as Soon as You’re Done with Them 📦
Don’t let clutter pile up. Put away clothes, toys, and other items as soon as you’re done with them.
Do a Quick Clean-Up Before Bed 🌙
Spend a few minutes each night tidying up your living spaces. This will help you start each day with a clean slate.
Don’t Procrastinate on Small Cleaning Tasks 🧽
Wiping down a spill immediately is much easier than scrubbing it off later.
Get the Whole Family Involved 👨👩👧👦
Assign age-appropriate chores to everyone in the family. This will help to distribute the workload and make cleaning feel less overwhelming.
Conclusion

There you have it! We’ve covered the 7 basic cleaning steps from top to bottom, inside and out. Remember, cleaning isn’t just about getting rid of dirt and grime – it’s about creating a healthier, more peaceful, and more enjoyable living space. By following these steps and incorporating some of our tips and hacks, you can transform your cleaning routine from a dreaded chore into a satisfying and rewarding experience.
Remember, a clean home isn’t just about appearances, it’s about creating a space that supports your well-being. So, put on your favorite playlist, gather your cleaning supplies, and get ready to create a home you love!
Recommended Links
👉 Shop Cleaning Products on:
- Mrs. Meyer’s Clean Day Multi-Surface Cleaner: Amazon | Walmart | Mrs. Meyer’s Clean Day Official Website
- Windex Original Glass Cleaner: Amazon | Walmart | Windex Official Website
- Lysol Bathroom Cleaner: Amazon | Walmart | Lysol Official Website
- Method: Amazon | Walmart | Method Official Website
- Seventh Generation: Amazon | Walmart | Seventh Generation Official Website
- Dr. Bronner’s: Amazon | Walmart | Dr. Bronner’s Official Website
Check out these books on Amazon:
FAQ

What are the 7 stages of cleaning?
The 7 stages of cleaning are a comprehensive approach to cleaning any space. They are:
- Getting Ready: Gather your cleaning supplies and put on protective gear.
- Taking Stuff Out: Declutter and organize the space to make cleaning easier.
- Dusting Everything: Remove dust from all surfaces, starting from the highest point and working your way down.
- Cleaning Surfaces: Clean countertops, sinks, appliances, and other surfaces with appropriate cleaning solutions.
- Vacuuming and Sweeping: Remove dirt and debris from floors with a vacuum cleaner or broom.
- Mopping the Floor: Clean hard floors with a mop and a floor cleaner.
- Final Touches: Put everything back in its place, make your bed, and add any finishing touches to make your home feel fresh and inviting.
What are the 7S of cleaning?
The 7S of cleaning is a framework for maintaining a clean and organized workplace. They are:
- Sort: Identify unnecessary items and remove them.
- Straighten: Organize remaining items in a logical and accessible manner.
- Shine: Clean and polish all surfaces.
- Standardize: Establish procedures and guidelines for maintaining cleanliness.
- Sustain: Implement regular cleaning and maintenance routines.
- Safety: Ensure a safe and healthy work environment.
- Systemize: Develop a systematic approach to cleaning and organization.
Read more about “The Ultimate 55-Point Cleaning Checklist to Transform Your Home in 2024! 🧹”
What are the 5 fundamental cleaning?
The 5 fundamental cleaning steps are a simplified approach to cleaning any space. They are:
- Declutter: Remove unnecessary items and organize the space.
- Dust: Remove dust from all surfaces.
- Clean Surfaces: Clean countertops, sinks, appliances, and other surfaces.
- Vacuum or Sweep: Remove dirt and debris from floors.
- Mop: Clean hard floors with a mop.
What is the last step in the 7 step cleaning process?
The last step in the 7 step cleaning process is Final Touches. This step involves putting everything back in its place, making your bed, and adding any finishing touches to make your home feel fresh and inviting.
Reference Links
- Mrs. Meyer’s Clean Day: Mrs. Meyer’s Clean Day Official Website
- Windex: Windex Official Website
- Lysol: Lysol Official Website
- Method: Method Official Website
- Seventh Generation: Seventh Generation Official Website
- Dr. Bronner’s: Dr. Bronner’s Official Website
- 7 Steps to Effective Cleaning & Sanitising – Resource Library: Food Safety Australia